Summary
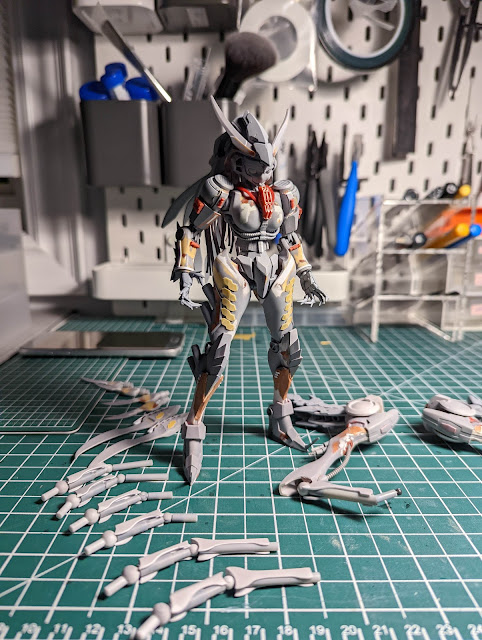
Here it is, the second of my Starcraft builds - inspired by Sarah Kerrigan, the Queen of Blades. I've been working on it for quite some time. It started with the idea of making a backpack to add to the existing Nobell gundam, but as I altered proportions to give the silhouette more curves, it took on a life of its own and became one of the most extensive builds I've ever done, with the mech being nearly all scratch-built, consisting of joints, pla-tubing, and lots of putty. Appropriately, I've entered her into the Original Mecha Contest 2022.
Hope you enjoy the WIPs that I have documented over the course of the build - you are in for a long post.
Check out my IG for more regular updates: @yulongsgunpla
Prep
Originally, I just wanted to find a feminine-looking kit and go from there, so based on what was available at the time, I picked the Nobell. Looking back, even though this was a 'girl' gundam, the proportions still don't quite work. The thighs were smaller than the calves, and forearms larger than the arms. I would have to modify all of it (the new HG Aerial would have been perfect for this).
Initial snap build
I started with the arms, and wanted to add plating to resemble Kerrigan's spikes, but the size of the forearm was disproportionately large, so I ended up scrapping it entirely and tried to approach it from a different direction.
I jumped to the legs to improve the thigh proportions. So I replaced the existing thigh pieces with leg parts of the Qubeley, since I liked the look of the curves. This however, made the kit look too stubby so I lengthened the calves as well.
Shin extension
I then scratch-built the crotch area to make it more angular to match the thigh. The Nobel's crotch armour was made to look like a short skirt, and that was not going work. I also extended the length waist and made a butt-plate.
Waist modifications
Lower body front
Lower body back
Revisiting the upper body, I decided to still use the Nobell's joints for the arms, but I reversed the direction so the larger forearms became the arms instead. I then built plaplate around the forearms and fixed a connector for attaching these awesome Kotobukiya claw hands. I also added shoulders using some round parts I found in my parts bin, and I cut off some portions of it to make the boobs, but they turned out to be too round and had to be scrapped as well.
Upper body
By now the size of the Nobel has already changed substantially. The head of the original kit is too small, so I used Mobile Doll Sarah's faceplate and attached the 30 minute mission Sengoku weapons parts to simulate hair. the boobs rebuilt using putty. I also took the opportunity to build up the thigh with putty and plaplate, and applied more putty around the forearms. By now I was much happier with the overall shape.
After refinement
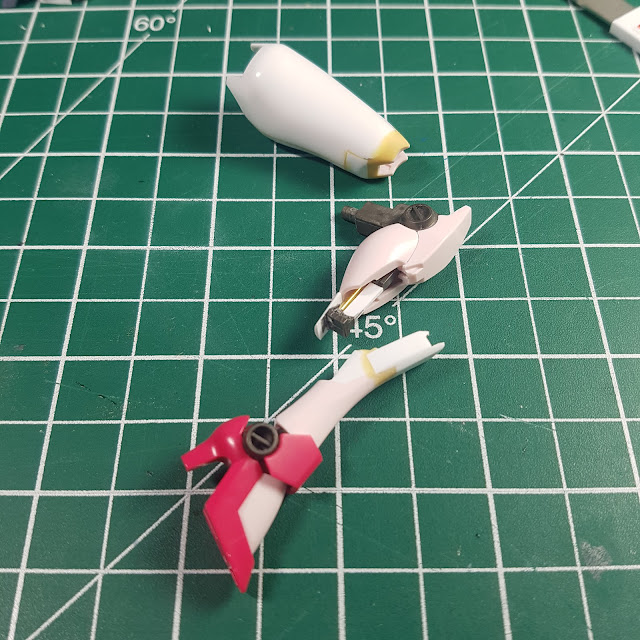
Next up was the wings. I knew I wanted to keep the weight down, so I used thin pla-tube as the skeleton. I built a custom joint with 3 polycaps to hold the 3 wing blades on each side. The blades themselves were plaplate, cut to shape.
Wing skeleton
Here I hit a bit of a wall trying to come up with a way to build around this wing skeleton while keeping the weight down. I mainly needed to build a transition between the platube and the blades, as they look quite rough at this stage. So I decided to jump off and finish up the main body first while I let the idea process in the back of my head. I added surface details and filled spaces with putty to streamline the design.
Surface check front
One shortcut I found was to use a pla-rods with 90 degrees bends built in. I can cut them at an angle and stack them on top of each other to create pleated armor, like you see below on the back, knees, and forearms. I also added back the Nobell's hair for good measure.
Surface check back
Getting back to the wings. I was at a time-crunch so I took less WIP shots. My hands were always full of wet-sanded putty that I didn't want to touch my phone. Essentially, I added several shapes from my spare parts bin onto the main wing, including more 30MM Sengoku pieces, and puttied it up so make all the transitions smooth. I also used putty and plaplate to crate transitions from the tubes to the blades. I then scratch-built armour pieces to cover the tubes so they don't look too out of place.
I then made some final modifications to the body to add surface details. This included more hair from MG Virtue, and surface plating/tubing.
Hair
Painting
This was a little nerve wracking - I was in a time crunch to finish before the contest, but with so much work put in, I was pressured to do the build justice with a passable paint job. Kerrigan's artwork had greens, reds, and browns, with some purple, but I honestly just didn't like how that combination looks.
In Heart of the Swarm, she had more of a glowing purple theme going, so that's where I drew the inspiration. I added muted greens as a complementary colour, and orange contrast as highlights. I also did a lot of brush painting using acrylic paints reach areas unreachable by airbrushes.
Funny story - to add to the complications, my airbrush compressor gave out right as I was about to start painting and I thought I was screwed, but somehow it managed to fix itself during my paint session, and died right after I finished. RIP Amazon compressor (2017-2022) - you gutted it out with your dying breath.
I also applying a purple-white gradient on the wing joints, blades, and claws to simulate energy glow. I added that effect to the main body and masked it with 1 mm tape before painting my base coat to create stripes along her body for added detail and the effect of energy flowing from a glowing inner frame.
- Primer: Mr. Surfacer grey
- Blacks and greys: Nazca Frost Matte Black + 2 grey mixes by titrating Nazca Warm White
- Purples: Mix of SMS wine red, Mr. Hobby Navy Blue, Mr. Hobby purple
- Green: SMS protective green
- Orange: Citadel acrylic mix
- Gloss: Pledge
- Panel line: Mr. weathering colour black
- Decal: Dalin waterslides for Jesta Cannon
- Matte coat: GX144
Gallery
Posing this thing was a nightmare. The wings are far too heavy so it has to be supported with an action base. As such, there aren't any cool poses to photograph until I make a custom base.
Remarks
Quite a journey from start to finish. Very satisfied with the work, and it hope it does well in the contest. As a Zerg player when I used to play SCII, I really wanted this to turn out well. None of my projects have taken this long, and I've almost gotten tired of looking at it. Maybe your fresh sets of eyes can appreciate the finished product a bit more.
As next steps, I am building a custom base to be to support the kit and hold it to a more dynamic pose. I'll probably add some weathering and dry brushing to highlight some of the surface details of the main kit also, as the pint job is on the darker end.
My next build would be to complete the Starcraft trio with a Terran unit, but I'm going to need some chill builds before I start up another extensive project.
Thanks for reading if you stuck it out this far!
- Y


.jpg)
.jpg)
.jpg)
.jpg)
.jpg)
.jpg)
.jpg)
.jpg)
.jpg)
.jpg)
Comments
Post a Comment